OpenCms 13 on Debian 11
Version 10: https://documentation.opencms.org/opencms-documentation/server-installation/tested-software-versions/#jdk
Version 13: https://github.com/alkacon/opencms-core/blob/master/INSTALL.md
Prepare Server (AWS)
sudo -s
vi /etc/cloud/cloud.cfg
change preserve_hostname: false to true
hostnamectl set-hostname opencms1.dev2dev.net
Prepare Server (All)
apt update
apt upgrade
reboot to solidify hostname changes
Install Prereqs for Java 11 and Tomcat 9
apt install openjdk-11-jdk-headless
Install node, SASS and npm for Bootstrap 4 support of Demo Mercury Template (optional)
To just copy he Mercury Template as-is without being able to customize i, just grab it from github.
git clone https://github.com/alkacon/mercury-template
SCRATCH THAT, MUCH EASIER WAY I STUMBLED ACROSS:
Quicklaunch > Modules > Import Module (icon of up arrow into a dark gray cloud).
Select "import from server"
Click on "Module to Import" pull down options.
Whole slew of goodies there!
Select alkacon.mercury.template-13.0.0.zip
Target site is defaulted and grayed out to Root folder /
Click OK button.
Watch progress log:
As long as all went "ok" in green (no red), should eventually see:
"... finished updating search index "Solr Online"
... the project has been published
... the module has been imported"
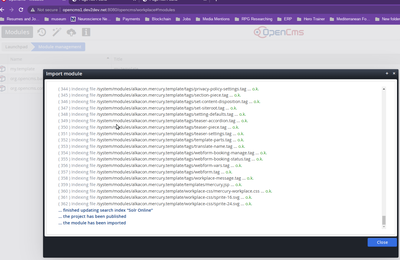
click Close.
MORE INVOLVED PROCESS, NEEDED IF DOING CUSTOMIZATION DEVELOPMENT
If you will want to be able to customize it the template/theme however, you will need to setup dev dependencies:
https://www.rosehosting.com/blog/how-to-install-node-js-and-npm-on-debian-11/
This could be install via apt, node, or nvm, for here we're going with the simple apt approach.
apt update
apt upgrade (if needed)
apt install nodejs npm
node -v
v12.22.12


npm -v
7.5.2
You will want version 12.x branch of Node for the OpenCMS 13 Demo Mecury Template based on Bootstrap 4 (as of September 4th, 2022).
Generally use the --global (or -g) flag to install modules since this is a single-user production server (remove development files after compilations are complete (or upload from dev system as appropriate for your environment and resources availabe).
npm install -g grunt-cli
Create package.json to install desired dependency packages:
mkdir prep-opencms
cd prep-opencms
vi package.json
:set paste (to prevent vi/vim auto-indenting unless vi environment already preconfigured)
paste the following into the file, save, and exit:
{ "name": "bootstrap4-sass", "version": "0.1.0", "devDependencies": { "grunt": "~0.4.5", "grunt-contrib-compass": "^1.0.4", "grunt-contrib-concat": "^0.5.1", "grunt-contrib-cssmin": "^0.14.0", "grunt-contrib-imagemin": "^1.0.0", "grunt-contrib-jshint": "~0.10.0", "grunt-contrib-nodeunit": "~0.4.1", "grunt-contrib-sass": "^0.9.2", "grunt-contrib-uglify": "^0.11.0", "grunt-contrib-watch": "^0.6.1" }}
Explanation:
The Grunt plugins specified above are the following:
- grunt-contrib-compass – use to compile Sass to CSS using Compass.
- grunt-contrib-concat – use to concatenate files.
- grunt-contrib-cssmin – use to minify CSS.
- grunt-contrib-imagemin – use to minify images.
- grunt-contrib-jshint – use to detect errors and potential problems in code.
- grunt-contrib-nodeunit – use to run Nodeunit unit tests.
- grunt-contrib-sass – use to compile Sass to CSS.
- grunt-contrib-uglify – use to minify files.
- grunt-contrib-watch – use to run tasks whenever watched files change.
npm install grunt --save-dev
npm audit fix
- npm install grunt-contrib-compass --save-dev
- npm install grunt-contrib-concat --save-dev
- npm install grunt-contrib-cssmin --save-dev
- npm install grunt-contrib-imagemin --save-dev
- npm install grunt-contrib-jshint --save-dev
- npm install grunt-contrib-nodeunit --save-dev
- npm install grunt-contrib-sass --save-dev
- npm install grunt-contrib-uglify --save-dev
- npm install grunt-contrib-watch --save-dev
npm audit fix
vi Gruntfile.js
module.exports = function(grunt) { // Project configuration. grunt.initConfig({ pkg: grunt.file.readJSON('package.json'), compass: { dist: { options: { sassDir: 'sass', cssDir: 'css', environment: 'production' } }, dev: { options: { sassDir: 'sass', cssDir: 'css' } } }, watch: { sass:{ files: ['sass/*.scss'], tasks: ['sass', 'cssmin'] } }, sass: { dist: { options: { compass: true, }, files: { 'css/style.css' : 'sass/style.scss' } } }, concat: { options: { separator: ';', stripBanners: true, banner: '/*! <%= pkg.name %> <%= grunt.template.today("yyyy-mm-dd") %> */\n' }, dist: { src: ['js/*.js'], dest: 'js/main.min.js' } }, uglify:{ options: { manage: false, preserveComments: 'all' //preserve all comments on JS files }, my_target:{ files: { 'js/main.min.js' : ['js/*.js'] } } }, cssmin:{ my_target:{ files: [{ expand: true, cwd: 'css/', src: ['*.css', '!*.min.css'], dest: 'css/', ext: '.min.css' }] } } }); // Load the plugin that provides the "compass" task. grunt.loadNpmTasks('grunt-contrib-compass'); // Load the plugin that provides the "watch" task. grunt.loadNpmTasks('grunt-contrib-watch'); // Load the plugin that provides the "sass" task. grunt.loadNpmTasks('grunt-contrib-sass'); // Load the plugin that provides the "uglify" task. grunt.loadNpmTasks('grunt-contrib-uglify'); // Load the plugin that provides the "concat" task. grunt.loadNpmTasks('grunt-contrib-concat'); // Load the plugin that provides the "cssmin" task. grunt.loadNpmTasks('grunt-contrib-cssmin'); // Default task(s). grunt.registerTask('default', ['uglify','cssmin']);};npm install -g bootstrap-sass
git clone https://github.com/alkacon/mercury-template
Install Tomcat9
apt install tomcat9
Install MariaDB
apt install mariadb-server
sudo /usr/bin/mysql_secure_installation
SAY "Y" to using socket!
Harden mariadb.
Set the mariadb root password.
Y remove anonymous users
Y disallow root login remotely
Y remove test database and access to it
Y reload privilege tables now.
Before running OpenCms you must update the database setting max_allowed_packet to max_allowed_packet=32M
https://mariadb.com/kb/en/server-system-variables/#max_allowed_packet
Default Value:
- 16777216 (16M) >= MariaDB 10.2.4
- 4194304 (4M) >= MariaDB 10.1.7
- 1073741824 (1GB) (client-side)
- Range: 1024 to 1073741824
Max packet length to send to or receive from the server
You find this setting in the database configuration file, usually my.cnf on Unix systems
vi /etc/mysql/mariadb.conf.d/50-server.cnf
Set as as large as the largest BLOB in the database. A suitable value for OpenCms is 256M.
Query Cache Settings
MySQL's / MariaDB's query cache can significantly improve the page load times of an OpenCms installation. For older versions of MySQL / MariaDB, the query cache was switched on by default, in newer versions it is switched off. Thus, it is worth checking the query cache settings for your OpenCms database.
Relevant Query Cache Settings
query_cache_type
Set to 1 to enable the query cache.
query_cache_limit
Maximum size in bytes to one query result stored in the query cache. 131072 is a suitable value for an OpenCms installation.
query_cache_size
Size in bytes available to the query cache. 67108864 is a suitable value for an OpenCms installation.
Please refer to the MySQL / MariaDB documentation for a detailed description of all available query cache settings.
Example:
vi /etc/mysql/mariadb.conf.d/50-server.cnf
query_cache_type = 1
query_cache_limit = 131072
query_cache_size = 67108864
systemctl restart mariadb
Install Mariadb Java connector (JDBC-like)
apt install libmariadb-java
Install OpenCMS 13.0
wget http://www.opencms.org/downloads/opencms/opencms-13.0.zip
apt install unzip
unzip opencms-13.0.zip
Copy the opencms.war file from the distribution to {CATALINA_HOME}/webapps/ (replace {CATALINA_HOME} with the path of your Tomcat installation).
cp opencms.war /var/lib/tomcat9/webapps/
Restart Tomcat. Tomcat should now deploy OpenCms as a web application.
systemctl restart tomcat9
OpenCms requires that its *.war file is unpacked, otherwise OpenCms will not be deployed correctly. Make sure Tomcat does unpack the war file and creates the {CATALINA_HOME}/webapps/opencms/ directory, with the OpenCms files in this directory. The default configuration for your Servlet container may be to not unpack the deployed *.war file. If this is the case, you must unpack the opencms.war file manually.
cd /var/lib/tomcat9/webapps
ls -l
root@opencms1:/var/lib/tomcat9/webapps# ls -l
total 232060
drwxr-xr-x 3 root root 4096 Aug 22 07:07 ROOT
drwxr-x--- 5 tomcat tomcat 4096 Aug 22 07:15 opencms
-rw-r--r-- 1 root root 237618424 Aug 22 07:15 opencms.war
root@opencms1:/var/lib/tomcat9/webapps# ls -l opencms
total 12
drwxr-x--- 2 tomcat tomcat 4096 Aug 22 07:15 META-INF
drwxr-x--- 12 tomcat tomcat 4096 Aug 22 07:15 WEB-INF
drwxr-x--- 3 tomcat tomcat 4096 Aug 22 07:15 resources
Good.
Configure OpenCMS through Web Interface
Start the setup wizard by pointing your browser to http://localhost:8080/opencms/setup/
http://opencms1.dev2dev.net:8080/opencms/setup (make sure port 8080 is open, but only accessible to your IP, for example your Comcast IP, so no one else can setup the server before you).
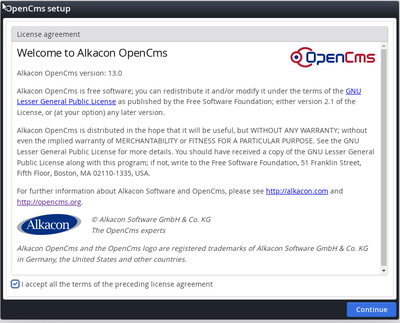
Accept license terms checkbox, then click Continue button.
Verify the Components Test shows all pieces passing (in green for passing):
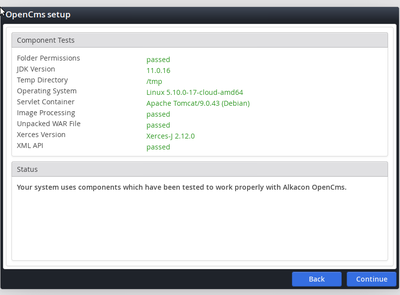
If all passed, click Continue.
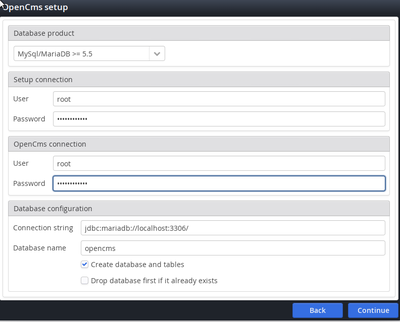
Verify/select correct Database Product from pulldown option.
Enter the mariadb root admin password created early and put in the Setup Connection password field.
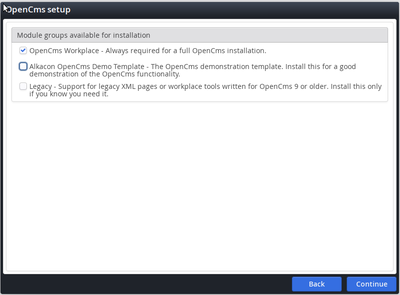
Select what bundles to initially install.
If a development setup, feel free to select both OpenCMS Workplace and (optional) AlkaCon OpenCMS Demo Template.
If this is your first time trying to setup and use OpenCMS, unless you are already very strong with JSP tempalte creation, I recommend you install the demo template if you want any kind of a working site any time soon. Or the 3-day training workshop: https://www.alkacon.com/en/opencms-training/basic/
Or you can the OpenCMS Mercury Template from here https://github.com/alkacon/mercury-template
If setting up production environment, probably only want to select OpenCMS Workplace.
Verify Server Settings:
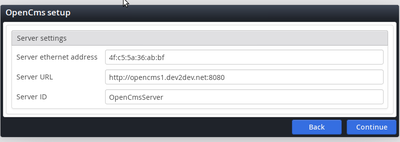
If correct, press Continue button.
Watch installation progress, watch for any errors or warnings.
When it is finished setting up, the Continue button will become available to click.
Congratulations the OpenCMS Setup is complete:
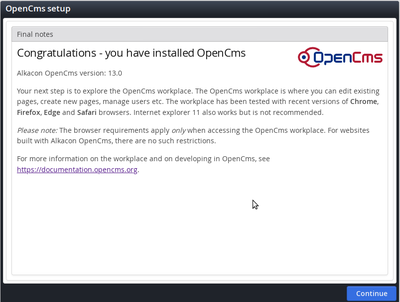
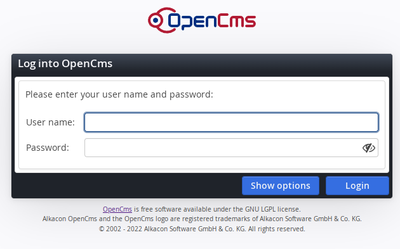
Click the Continue button to leave the setup wizard and proceed to the Login for the first time popup:
 a
a
Initially the default username and password login is:
Admin
admin
As soon as logged in, change the Admin password, and create additional accounts with more limited permissions.
Alkacon OpenCms Add-On Module Package (OAMP)?
Multiple Websites in OpenCMS Using Multi Site Management by Creating a New Project Site
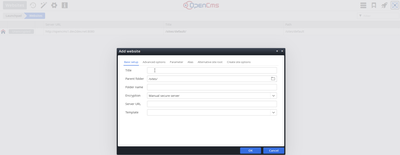
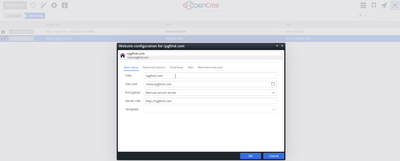
Create a new website:
Create a new project:
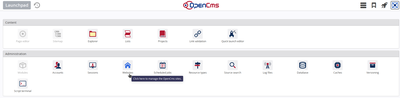
Launch the Launchpad:
Select Projects from the Quicklaunch dashboard:
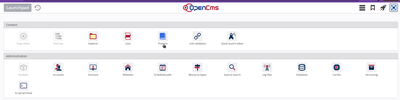
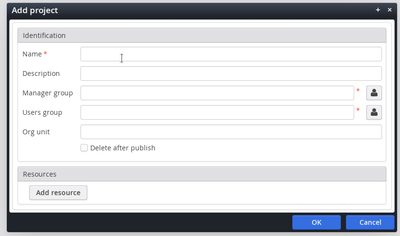
Add a new Project with "Add Project":

Fill in details:
References:
http://www.opencms.org/en/demo/features/version6/multisite.html
Setup Reverse Proxy nginx
apt install nginx
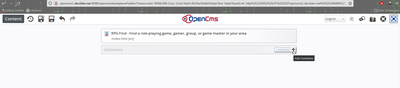
Creating Page with Explorer > Form Editor:
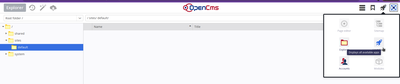
Launchpad > Websites
Select the site (far left column with mouse), clicking on the "house" icon > Explorer (NOT Page Editor yet oddly).
Select index.html icon left column > Advanced > Open form editor
Voila! Now I can fricking See where I can put content. Going strait to page editor from the website wasn't getting me anywhere, all the features/content were grayed out at this stage.
References
https://documentation.opencms.org/central/ main documentation
https://webmail.opencms.org/pipermail/opencms-dev/ - mailing list archives
https://documentation.opencms.org/opencms-documentation/server-installation/installing-opencms/index.html
Creating new web page / website basic JSP template to have anything work for a site:
https://documentation.opencms.org/opencms-documentation/creating-a-website/index.html
https://documentation.opencms.org/opencms-documentation/creating-a-website/creating-a-template-jsp/
https://documentation.opencms.org/opencms-documentation/background/the-module-system/
Install demo site data:
https://designmodo.com/bootstrap-4-npm-grunt-sass/
http://exprimiendoopencms.com/export/sites/sagasuite/.galleries/test-galeria-descarga/OpenCms-9.0.0-Documentation_v2.0.pdf Ancient version 9
Multisite
https://sitemap.opencms.org/en/demo/features/version6/multisite.html ancient version 6
http://incmnsz.mx/opencms/alkacon-documentation/howto_multisite/multisite.html (ancient version 7)